
Event Calendar
AE Connect now includes an Event Calendar. Use it to schedule school events, notify the right people, and keep parents informed through the parent portal.
Finding the Event Calendar
The Event Calendar is at the bottom of your menu, labeled Event Calendar.
When you first open it, you may see an empty calendar, or you may see events already on it. If you are a teacher, you may only see your own classes at first. That is normal.
Setting Up Permissions
If you need access to the Event Calendar, or need to create events, an administrator must grant permission to the right group.
1. Go to School Profile.
2. Select Settings.
3. Select the group that needs the permission.
4. Under Organization, find Event Calendar.
5. Choose a permission level:
• View: users can see events on the calendar but cannot create or change anything.
• Manage: users can create events on the calendar. Manage includes view access.
Viewing the Calendar
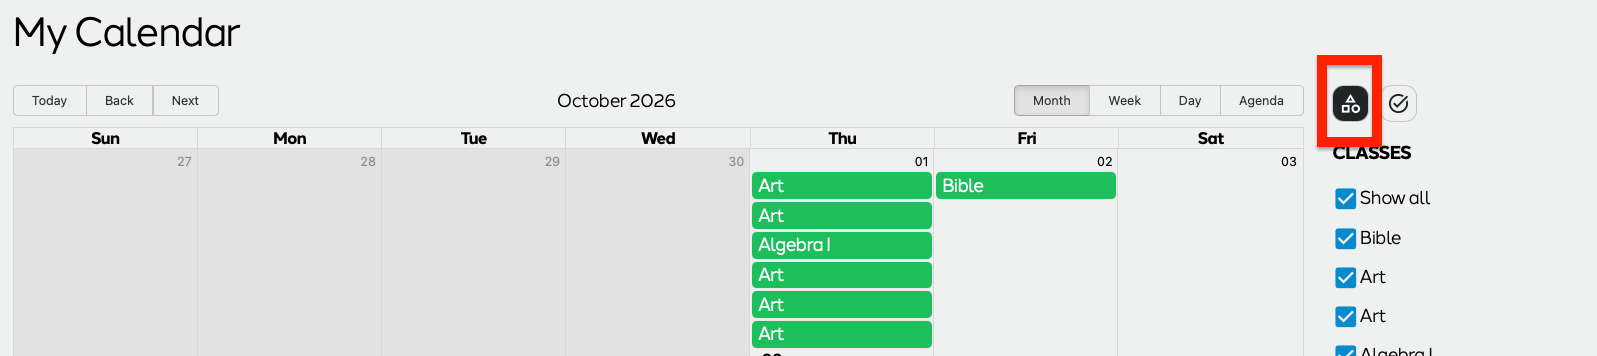
If you are a teacher, the calendar shows all of the classes you teach. To see only school events, click the icon to hide your classes. Click it again to show them.
Creating an Event
You need the Manage permission to create events.
1. Open the Event Calendar.
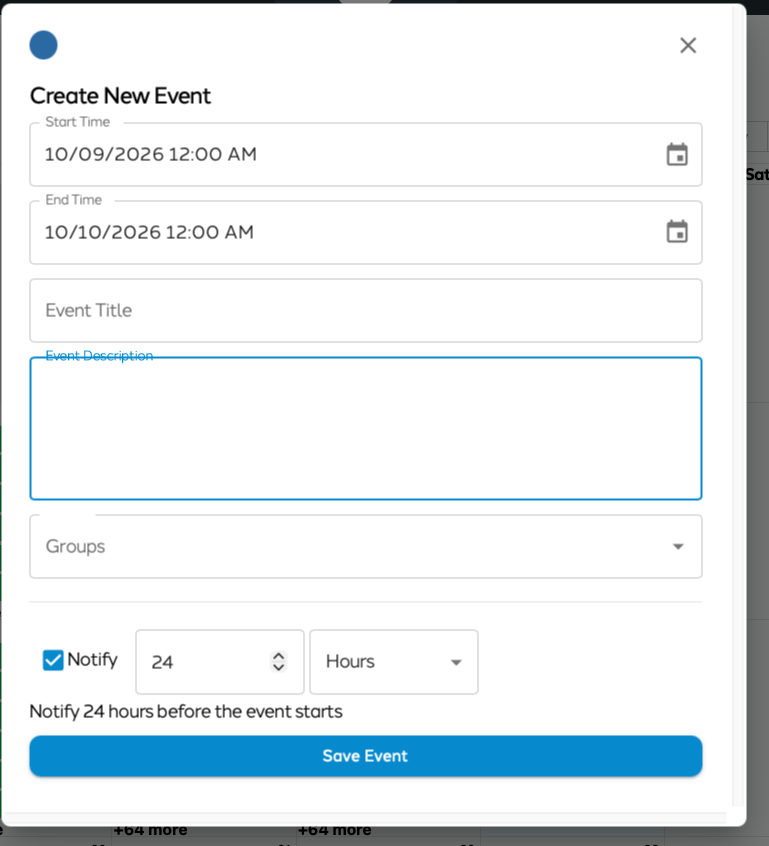
2. Double-click the date the event will take place. A new event window opens.
3. Confirm the date.
4. Set the time. Use the time picker, or type the time directly.
5. Enter a name for the event.
6. Add a description, if you like.
7. Assign the event to a group. See the section below.
8. Choose when to notify the group, such as 24 hours before, 10 minutes before, or weeks before.
9. Click Save.
The event is added to your calendar. It is also visible to parents in the parent portal, and parents are notified by email according to the notification time you chose.
Choosing a Group
Every event is assigned to a group. The groups you already use for messaging are available automatically, including all students, all parents, specific grade levels, and your classes.
For anything more specific, such as a drama club, volleyball team, or basketball team, you can create your own custom groups. For example, to put a basketball game on the calendar, create a basketball team group, then assign the game to that group.
Creating Custom Groups
1. Go to School Profile.
2. Select Groups.
3. Create a new group and give it a name, such as Basketball Team, Drama Club, Volleyball Team, Outdoor School, or Fun Committee.
4. Select the people who should be in the group. They are added as members.
5. To add people in bulk, use the filters. For example, filter by grade level to add all 8th graders and their parents.
Once a group exists, it appears in the group list whenever you create an event in the Event Calendar.