Getting to Know Messages (emails)
Overview
AE-Connect offers users the capability to send emails to staff, students, and parents. AE-Connect provides three types of messages: Broadcast, Alert, or messages without Broadcast or Alert checked.
This guide will explain these options, how to send messages and permissions for messaging.
Please see Permission explanation at the bottom of this guide.
Video Guide at Bottom of Guide
Descriptions & Pictures
AE-Connect provides schools with the ability to send emails to staff, students and parents. Emails sent from AE-Connect will also be sent out via Text if parents, or staff opt-into texting. Please see this guide for texting setup.
Explaining Message Section
Messages in AE-Connect are access via the message icon on the top right menu.


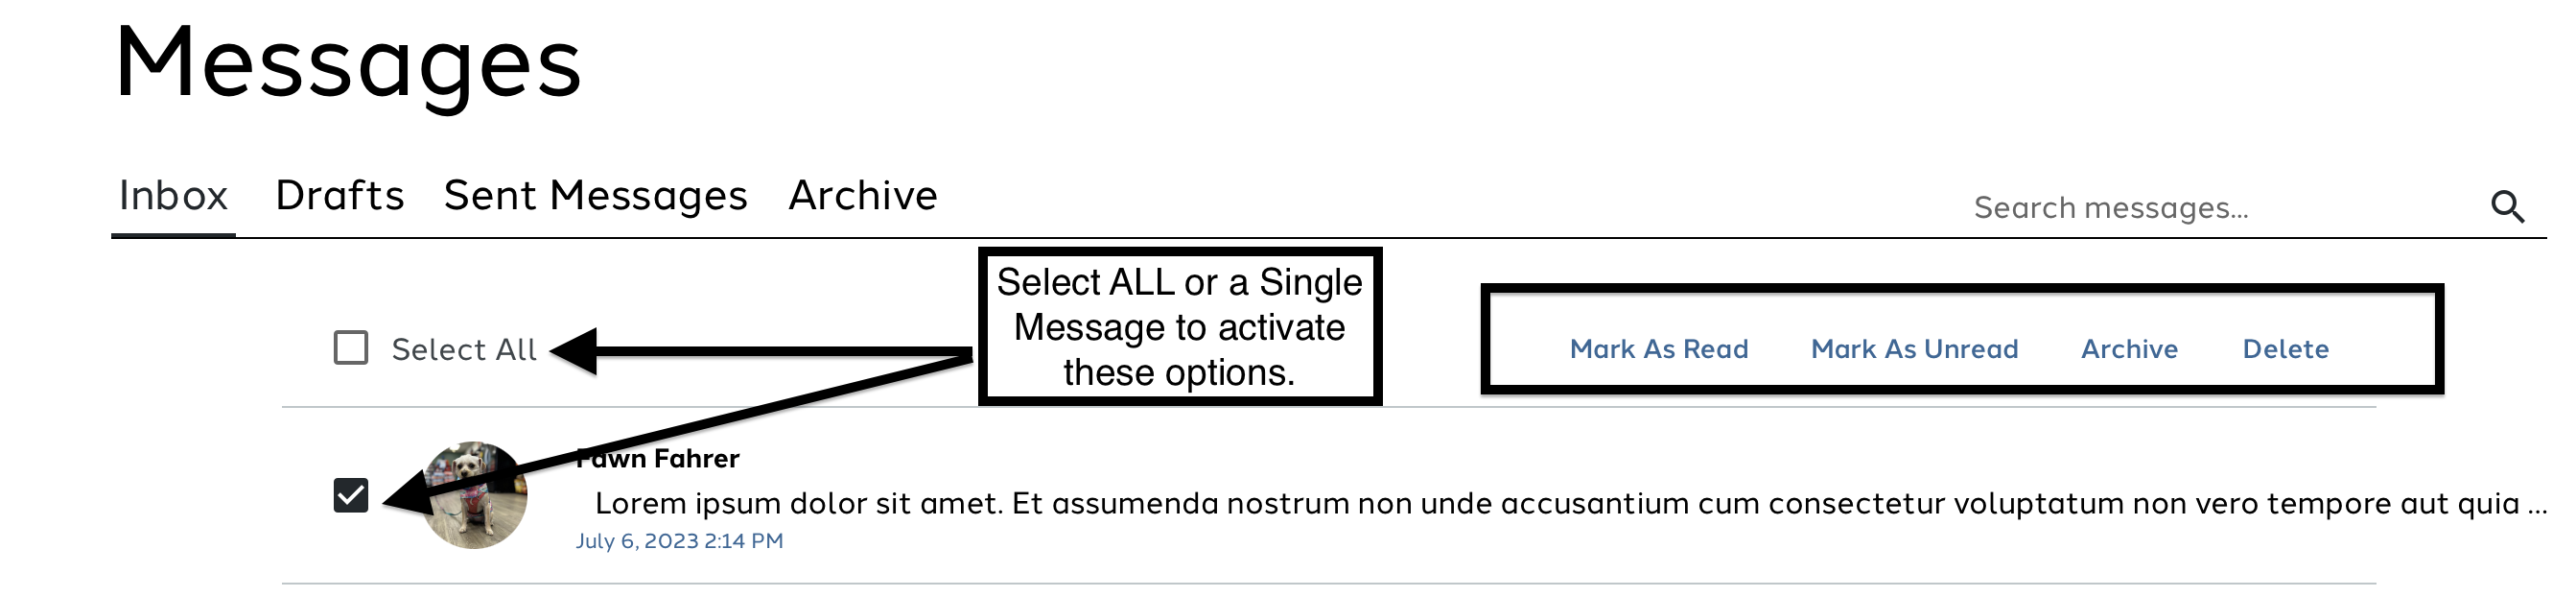
User should select the icon to get the message section of AE-Connect. The messages section consists of Inbox, Drafts, Sent Box and Archive box.
Inbox = All incoming messages.
Draft = All messages that are saved to send later
Sent = All messages that user has sent
Archive = All messages that have been archived.
In the Inbox and Draft box the users can Mark all as Read, Mark all as Unread, Archive or Delete.
To activate these options: Select one or more messages.
Sending Messages
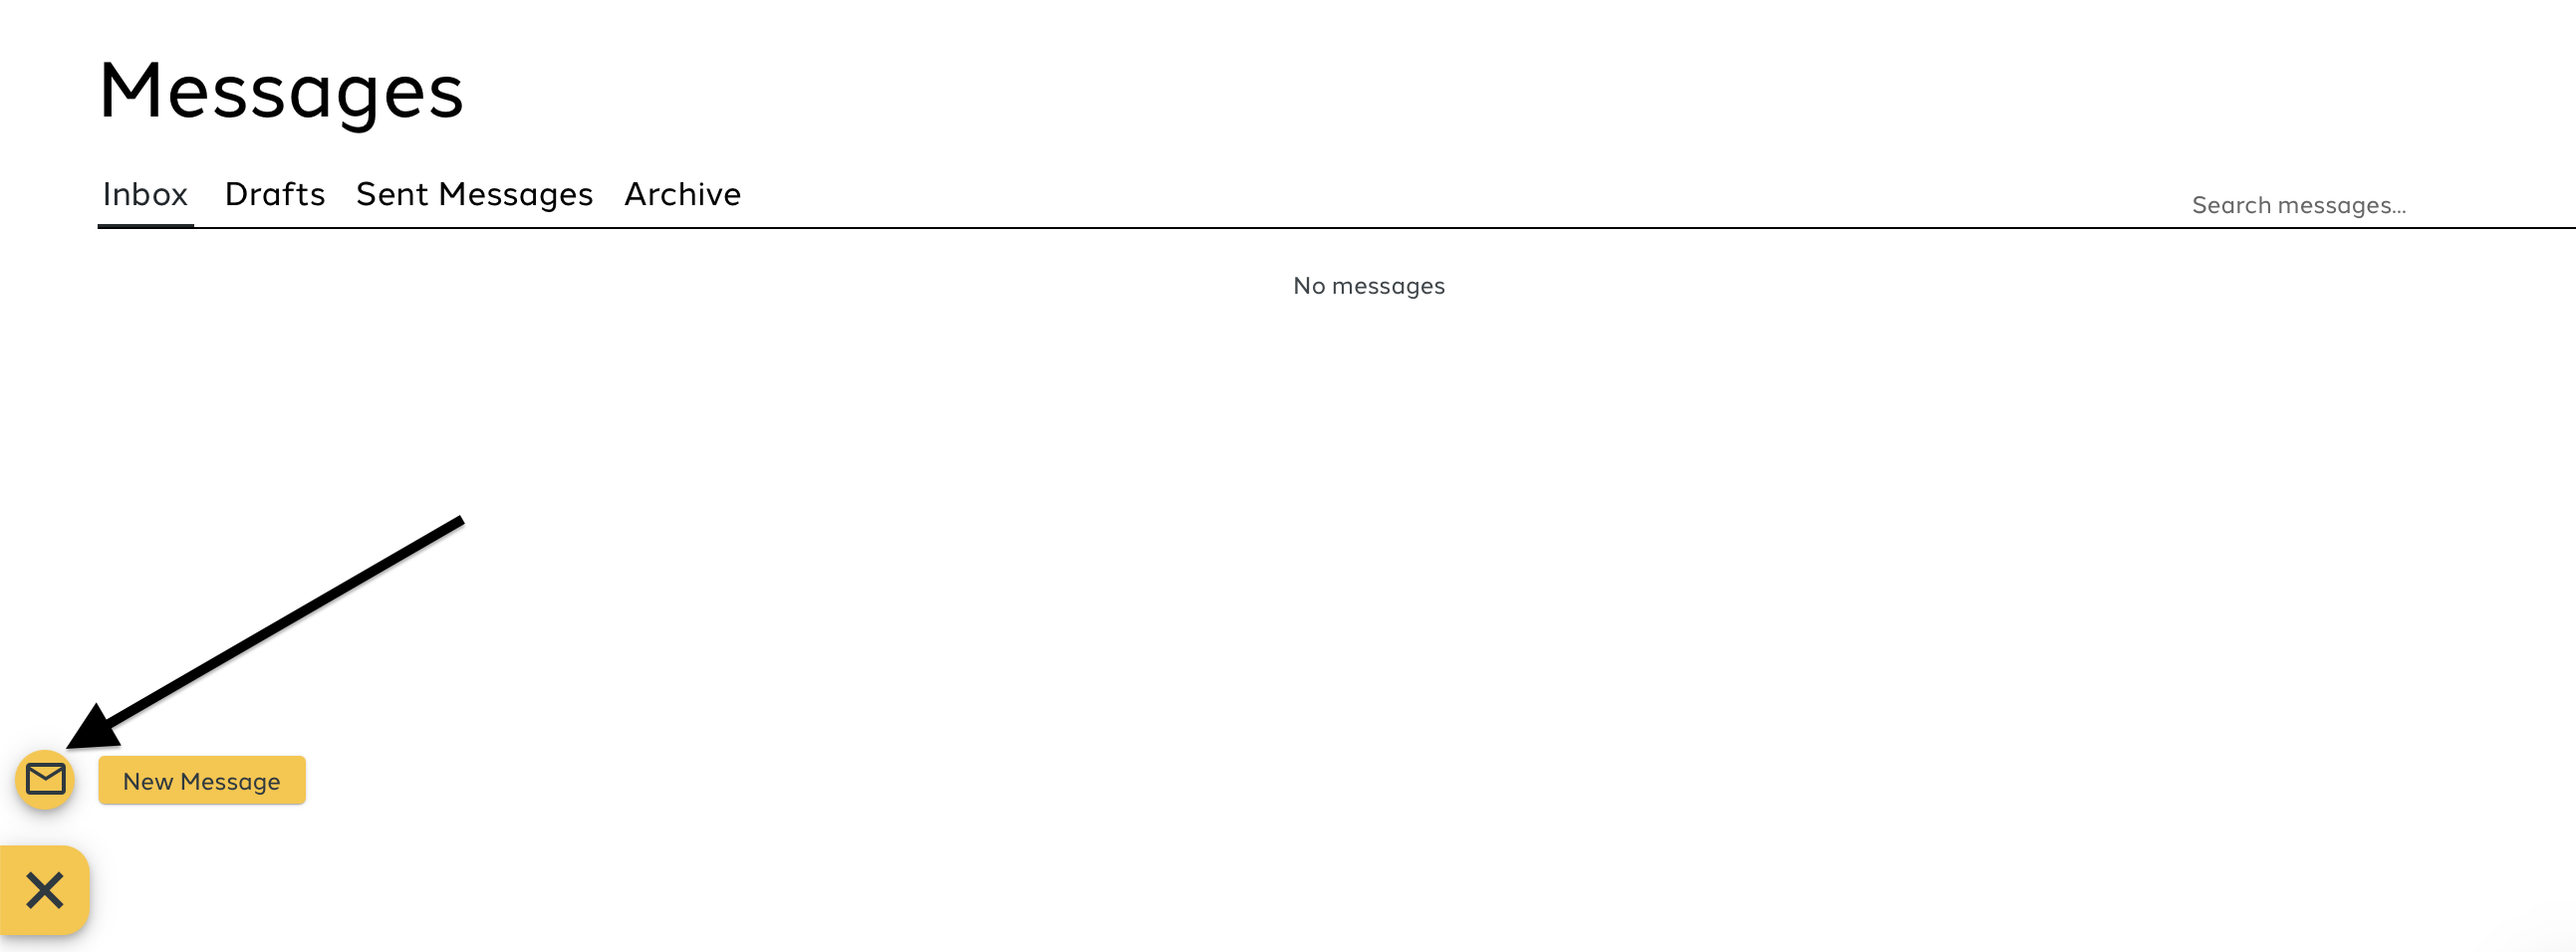
Messages are created using the action menu (yellow+) on the left side. User selects New Message and the Message flyout will open.
There are three ways of sending messages.
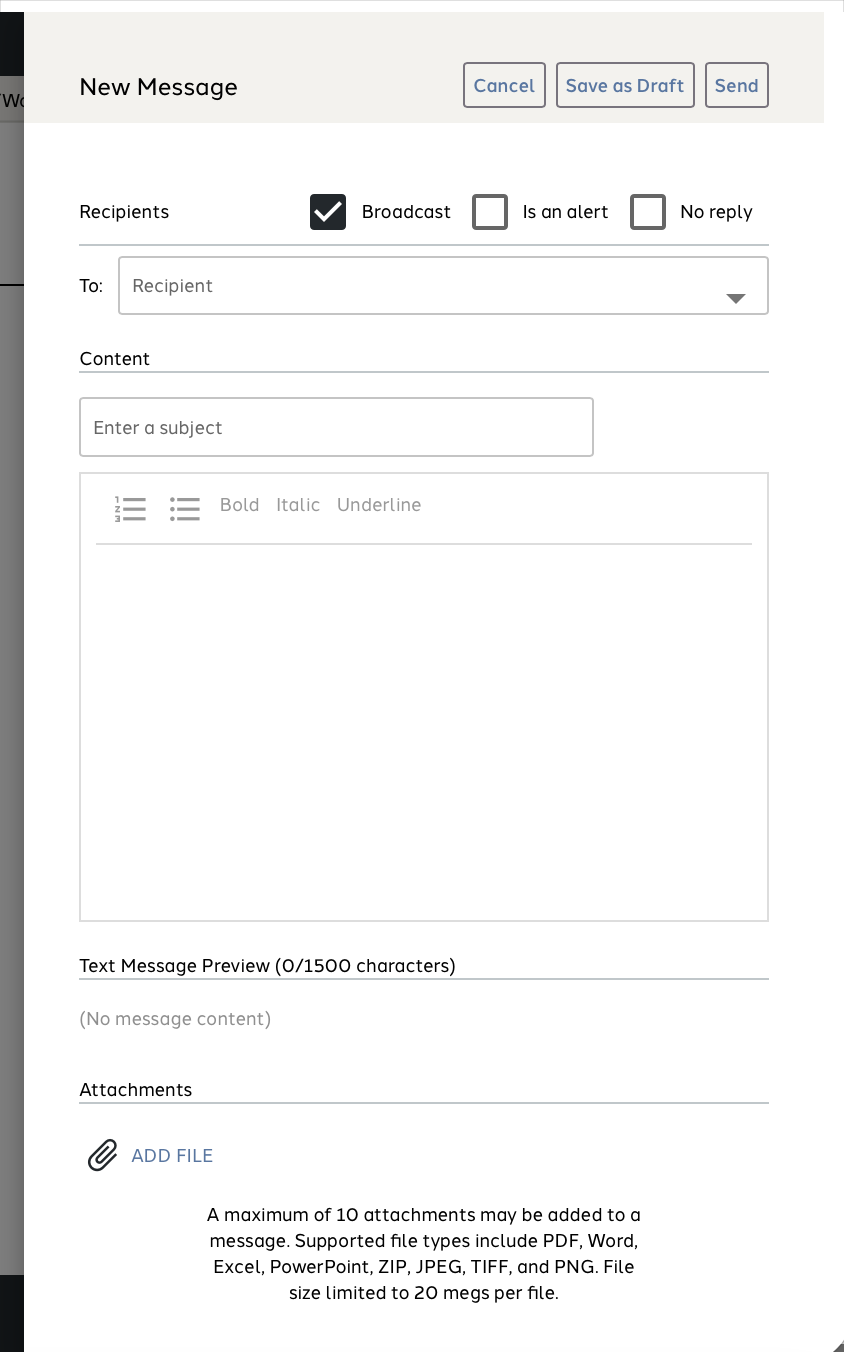
- Broadcast = Automatically be selected when opening the message flyout. Having this checkbox selected will send the message directly to the the recipient's email without requiring them to log in to their portal.
- Alert = The user should select this checkbox when sending a message that is intended as an alert or emergency. When selecting this checkbox, the body of the message will be sent directly to the recipient's inbox without the need to log in to their portal to read. The email will be read and indicate it is an Alert.
- No boxes are checked = When Broadcast or Alert are not selected the messages will go portal to portal. This means that when a message is sent from AE-Connect, it is delivered to the intended recipient. However, in order to access and read the message, the recipient must log in to their respective portal, whether they are a teacher, staff member, or parent.
Explaining Message Flyout
Recipients
Messaging has a sophisticated recipient search functionality.
The user can search for recipients using the following methods:
- By the name of the student, parent, or staff member
- By typing "All" to send an email to all parents, all students, all teachers, and/or all grades
- By typing "My" to send an email to all students associated with you
- By typing in a subject name, such as "Math", to send an email to all students and/or parents in your classes
- School Admin can create custom groups to send to. Create Custom Groups for Messaging Guide.
User can see number of receipent under the TO box. User can select recipients selected to see a list of recipients.

Content
The content area consists of the Subject and Body fields, both of which are required.
Texting
This is an OPT-IN ONLY feature. Please see guides above. The texting box reflect the first1500 characters of a message that will be sent to the text of a user if they opted in.
Attachments
A maximum of 10 attachments may be added to a message. Supported file types include PDF, Word, Excel, PowerPoint, ZIP, JPEG, TIFF, and PNG. File size limited to 20 megs per file.
Replying to Messages
Users have to reply to messages in their Student, Staff or Parent portal. The reply will be sent to your AE-Connect inbox. When you see a message in your inbox you can select it to read but you can also reply.
Users cannot reply directly from their Portal or it will bounce. Users must reply from Student, Staff or Parent Portal.
Permissions
There are a couple ways to manage permissions for messages.
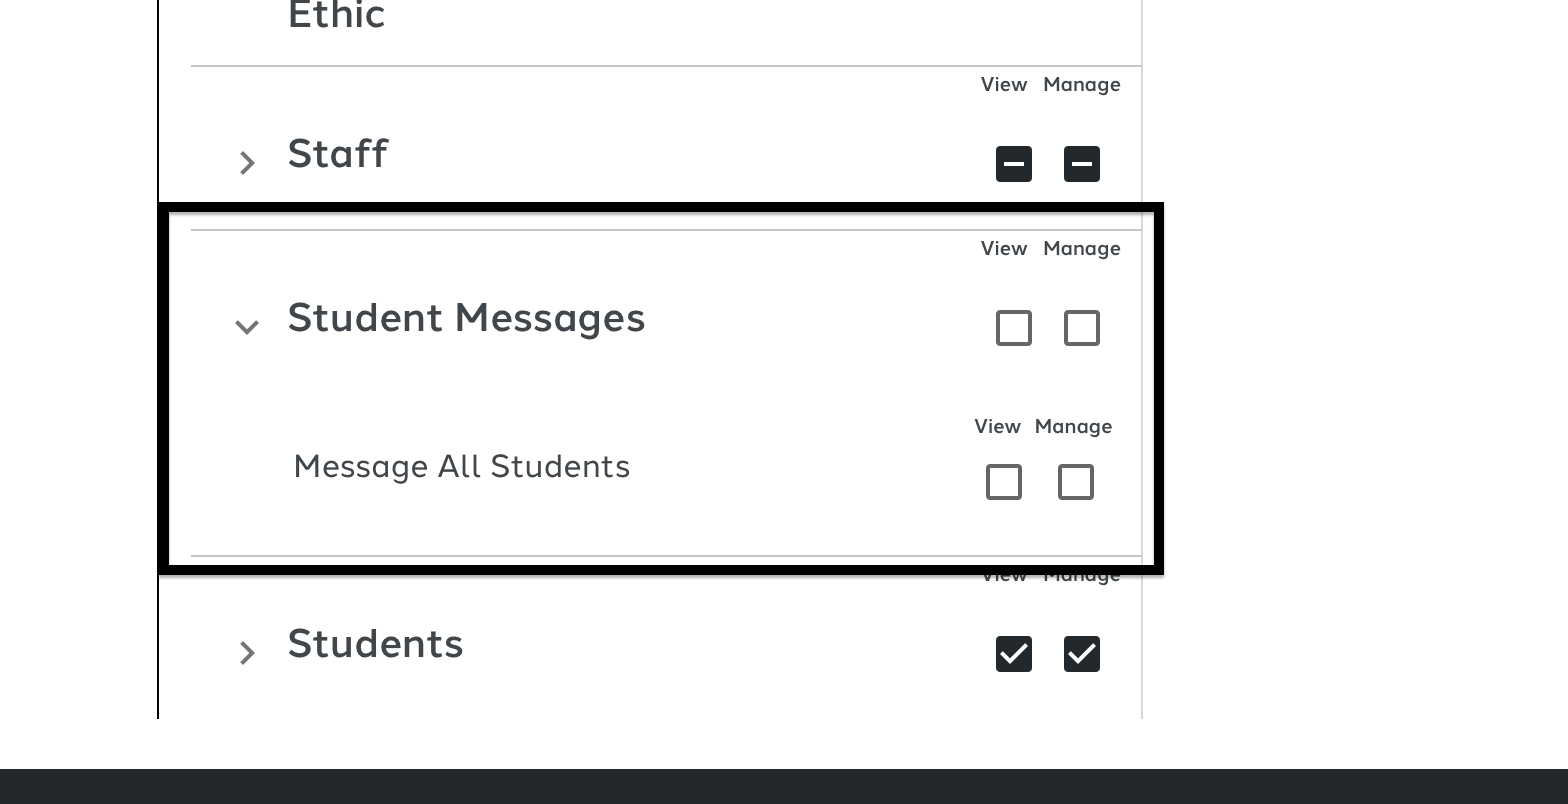
- Users has ALL STUDENTS (manage) and STUDENT MESSAGES (view & manage): This allows the users to message all students in the school. All Students & Guardians, All Grade 1 (student and guardian), etc.
- ALL STUDENTS also allows the user to see all students in the school.
- USERS has STUDENT MESSAGES (view & manage): This allows the users to message all students in the school. All Students & Guardians, All Grade 1 (student and guardian), etc.
- This permission is without All Students. The user will not see All Students int the school but will be allowed to message all students in the school.
- Users DOES NOT have ALL STUDENTS(manage) or Student Messages(view & message): This ONLY allows the users to message students they are homeroom teacher of or teacher. They will have access to the specific grades they teach and specific classes they teach.
- USER has ALL CLASSES (manage): This permission will allow user to message all classes in the school. Example: Math 1 (Students and Guardians).
Please see video for more of an explanation.
NEW PERMISSION
USER MUST HAVE STUDENT MESSAGE -Message All Students (view and manage) in order to message All Students/Parents in the school.